fire-base-project-setup
Create And Setup A Firebase Project
For FireMobile Plugin to work you will first need to have a firebase project ready .If you don't and firebase project please folow the bellow steps.
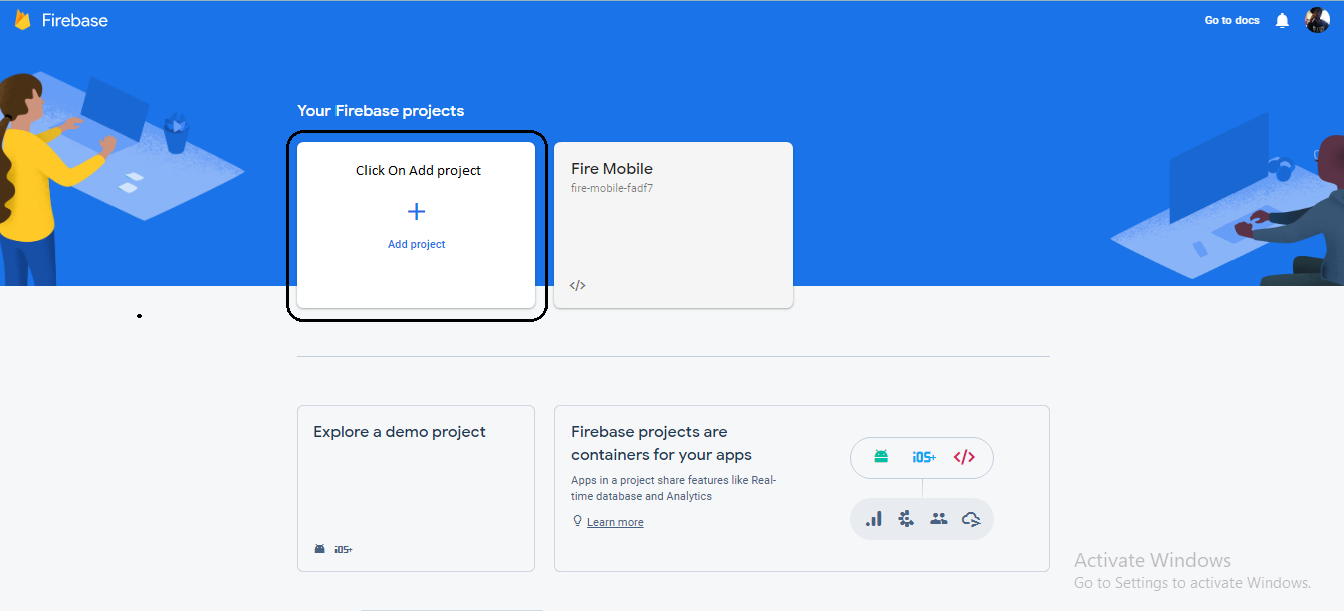
1. Go To https://console.firebase.google.com
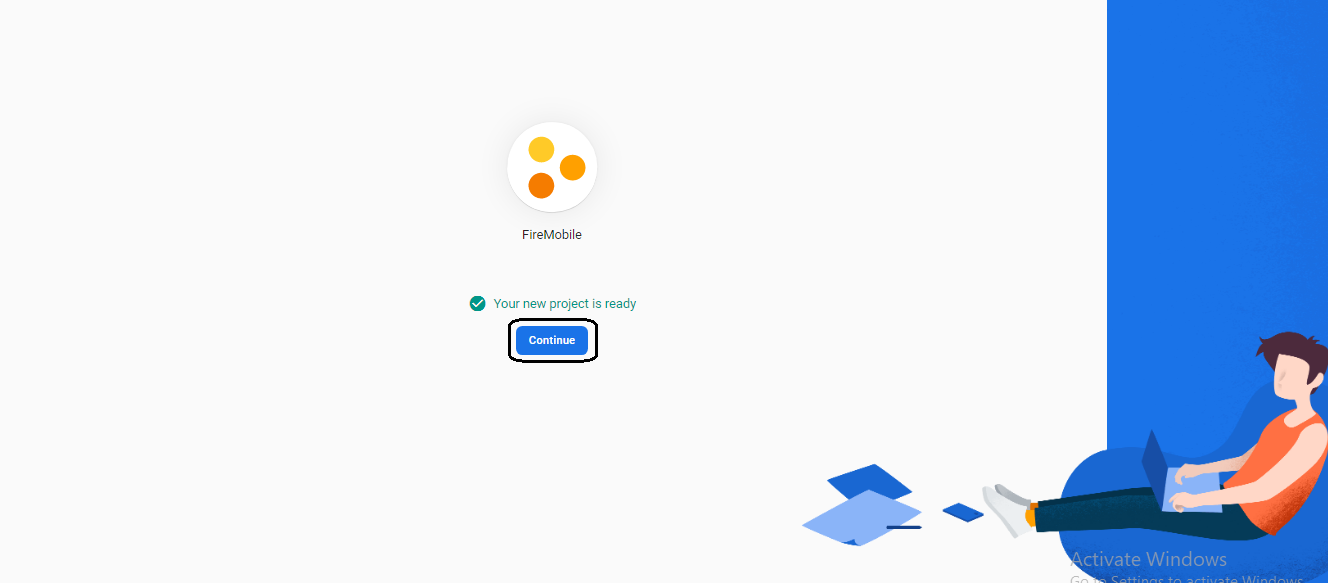
2. Click on Add Project and Enter your project name
3. After adding your project add a web app from your project settings
4. After adding the web app the apiKey,authDomain,projectId etc will be generated
5. Copy those codes and paste those in your fire mobile plugin input fields
6. In your firebase project go to Build->Authentication->sing in method
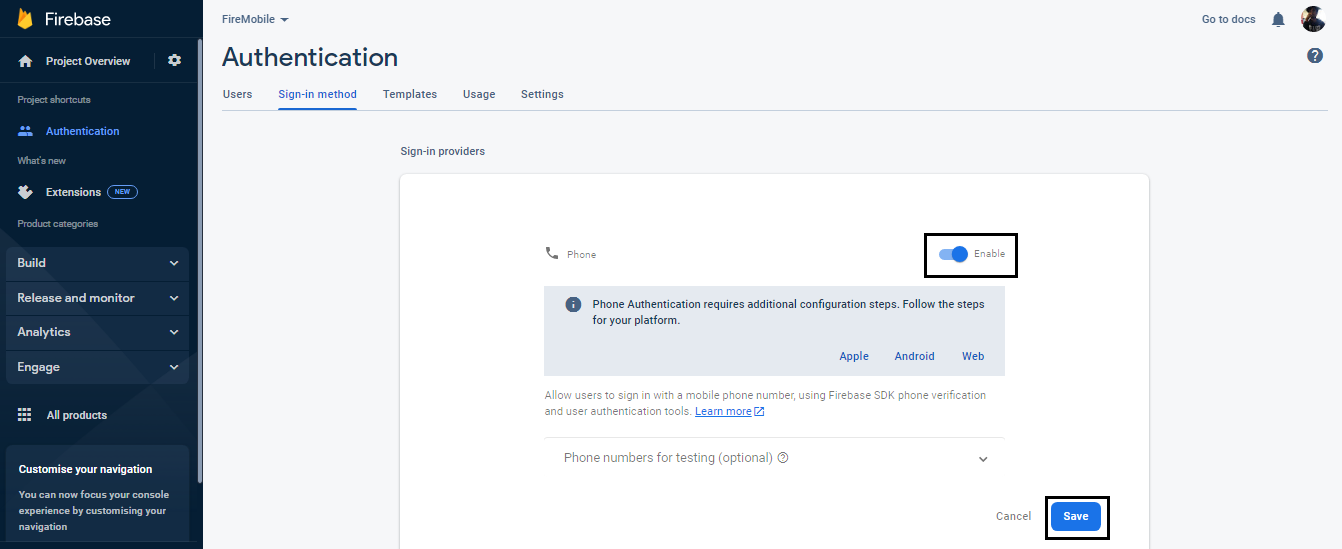
7. Now Enable phone service provider
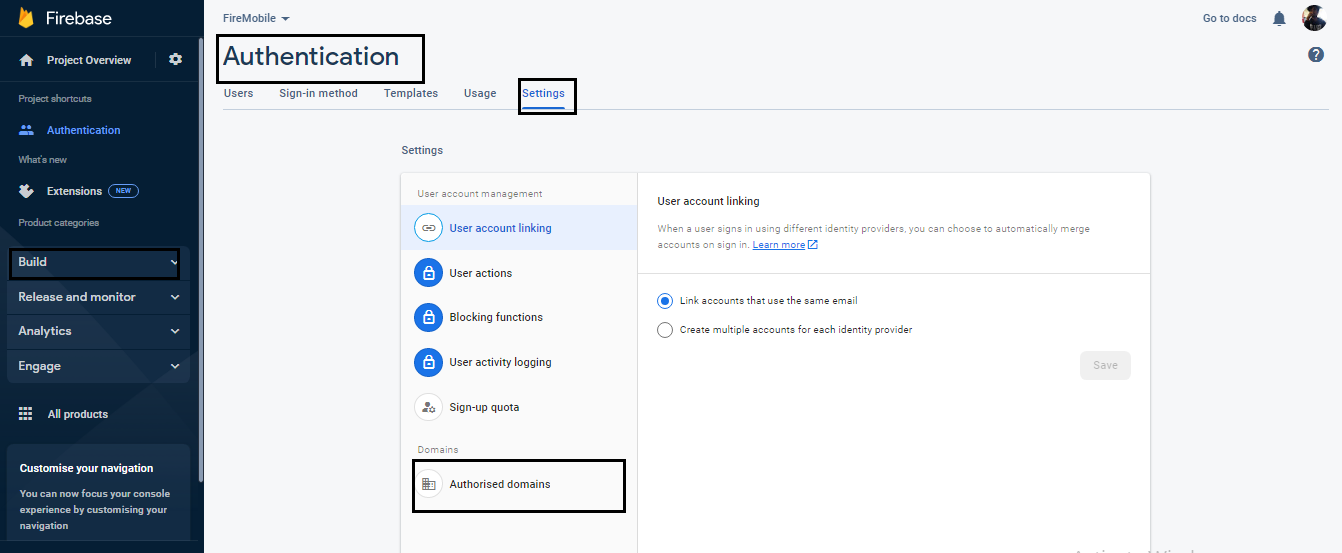
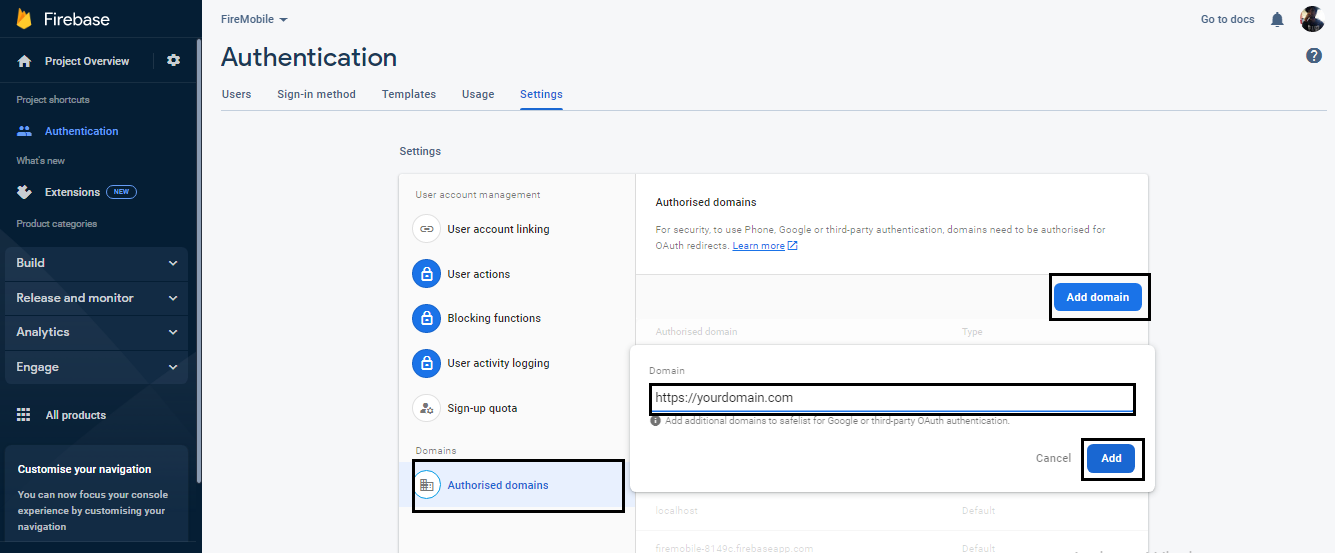
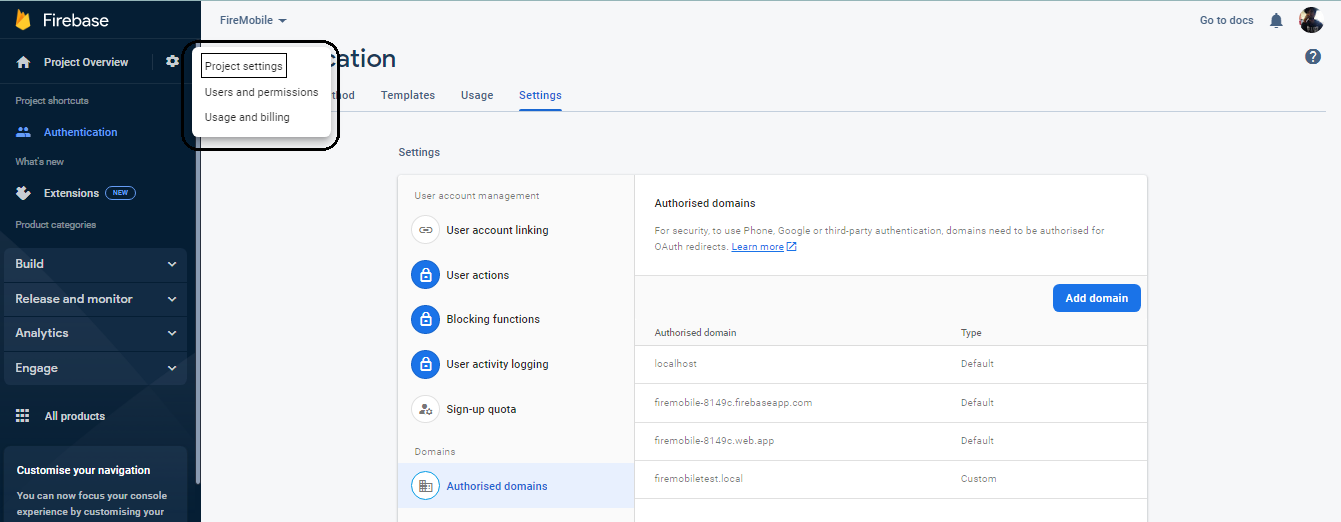
8. In your firebase project got to Build->Authentication->settings->authorized domian
9. Add your domain
After all the configuration is finished Copy this shortcode [firebase_otp_login] and add it to any place on your site
as you like.That's it, You should be able to use mobile login in your WordPress and
WooCommerce site.
Follow The screenshots for Properly setup Firebase Project
Adding Firebase project
Firebase Project Settings
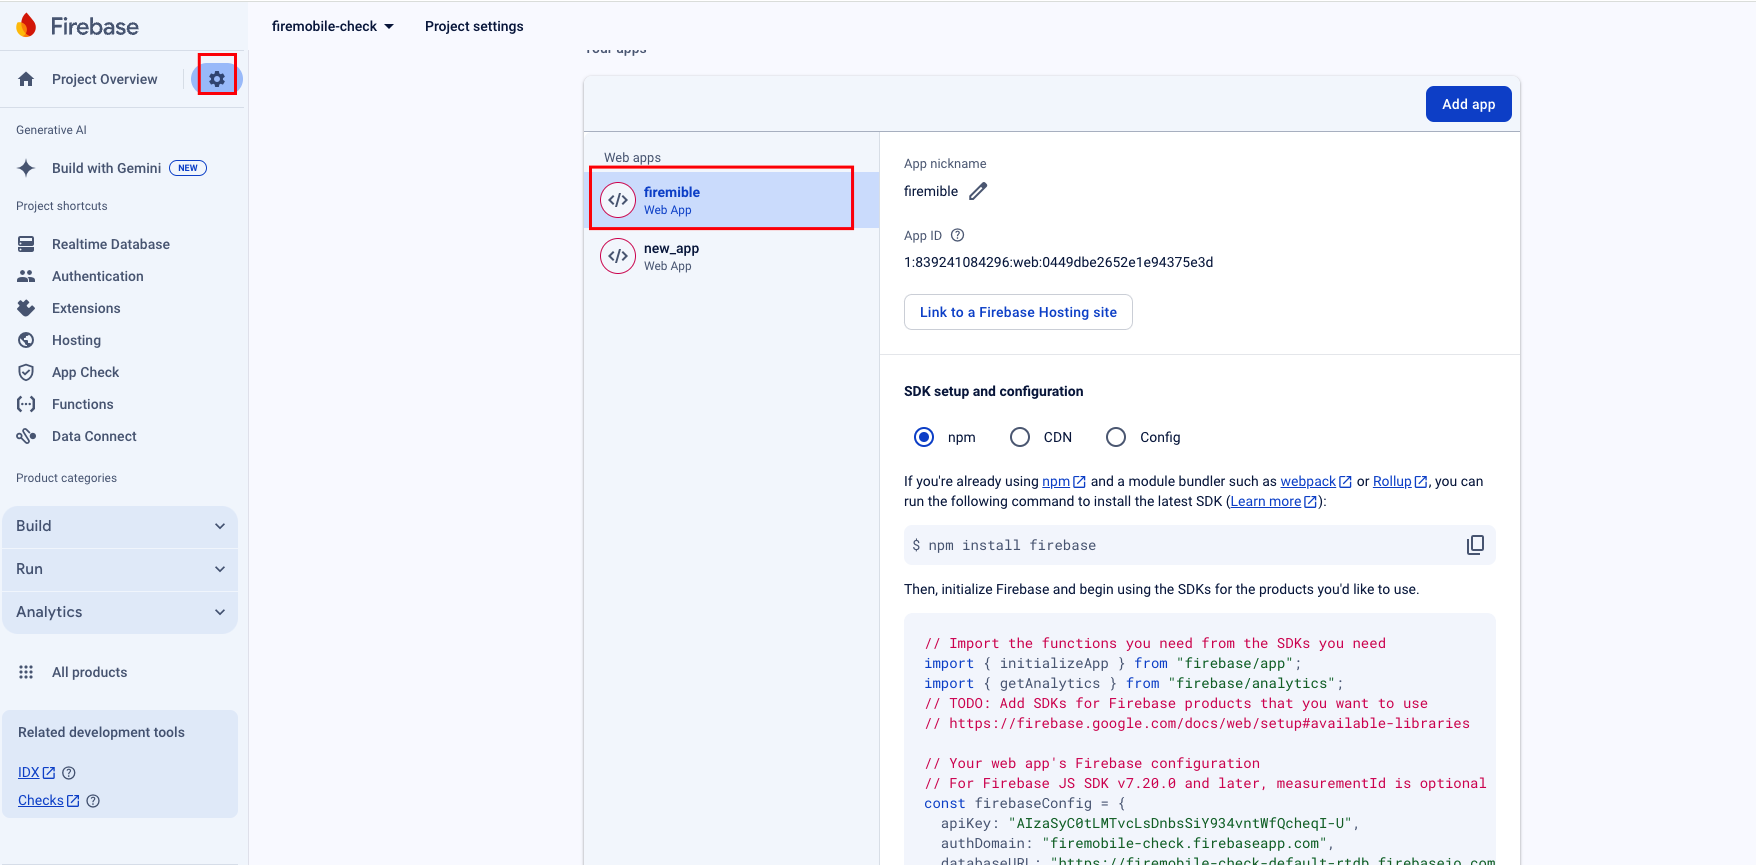
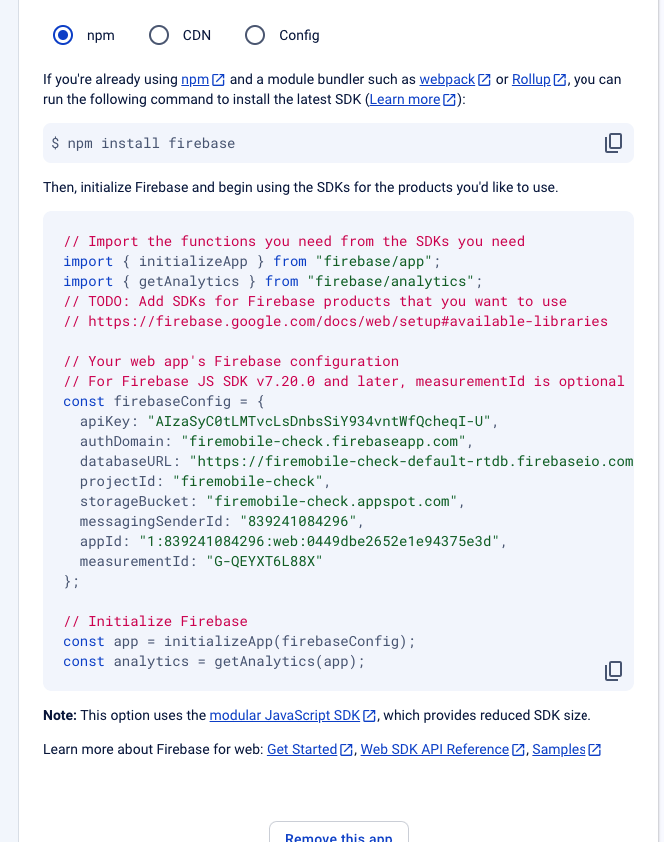
Now go to your Firebase Project overview-> Project settings and copy paste
firebase configuration in below fields one by one in your plugin
Authentication Settings And Add Sing In Method
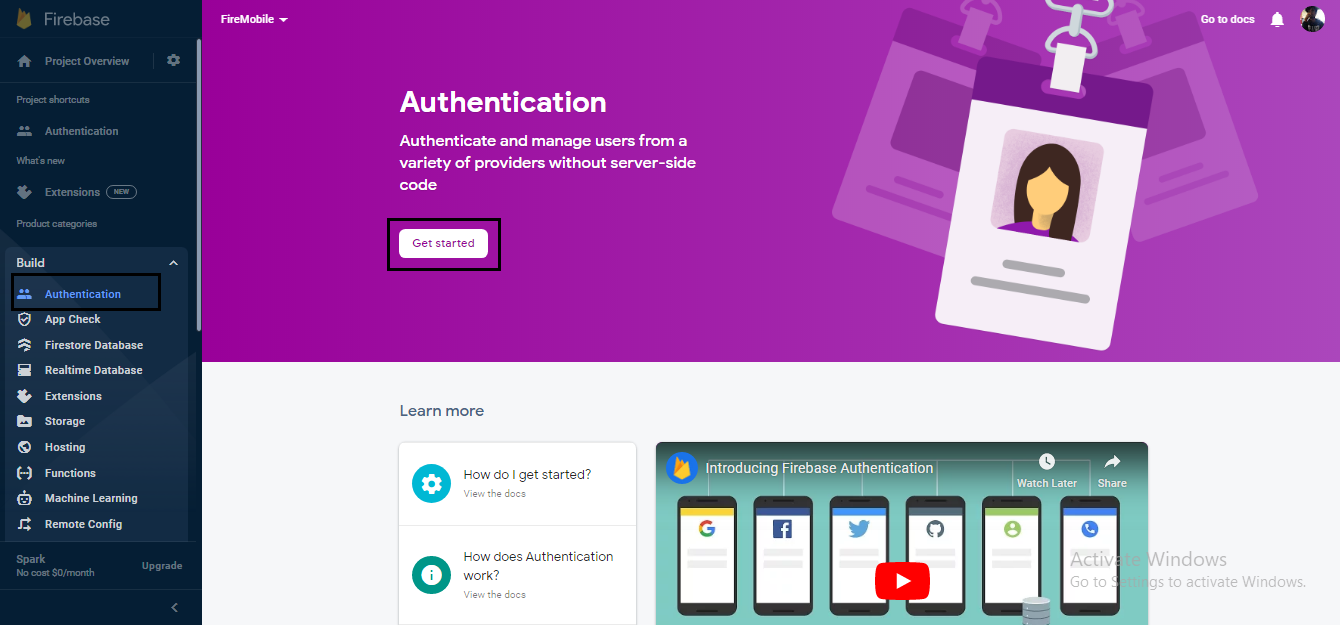
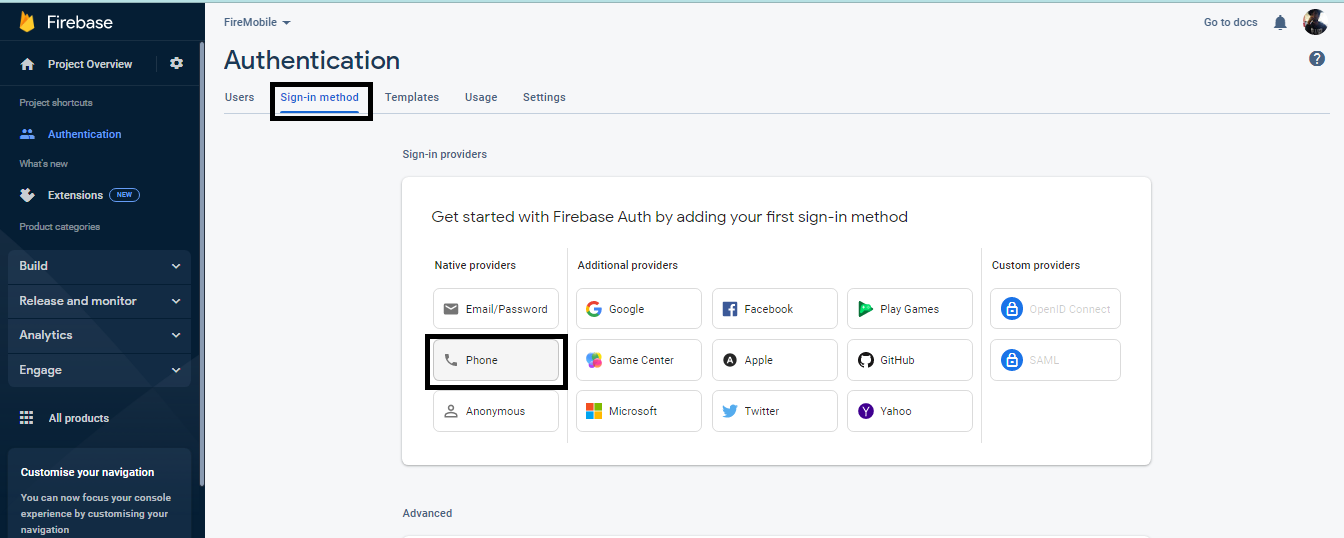
In the Firebase console, open the Authentication section
Go To sign in method
Add Sign-in providers -> phone
Enable provider
Add Authorized Domain
If the domain that will host your app isn't listed in the OAuth redirect domains section, add your domain
Go To Build->authentication->settings->authorized Domain
Add Your Domain